+8613003178786
  sales@lingyufab.com



Laser Cutting Piercing: How to Optimize Your Start Holes for Cleaner Cuts
14
Oct’2026Laser Cutting Piercing: How to Optimize Your Start Holes for Cleaner Cuts
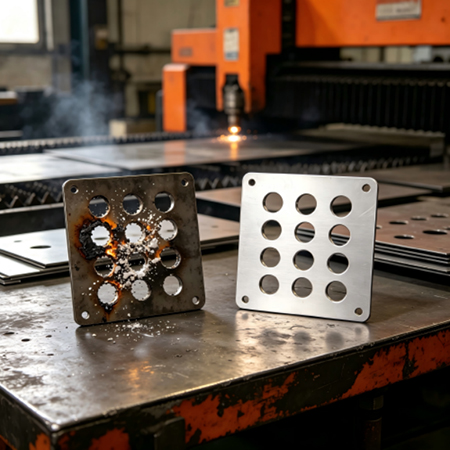
Laser cutting is one of the most precise methods for shaping sheet metal, but even the best machine can struggle with one critical step: piercing. Piercing is the moment when the laser first penetrates the material to begin a cut. This split‑second operation determines the quality of the entire cut. If the pierce is too aggressive, the material can splatter, leaving molten metal deposits on the surface. If it’s too slow, the heat builds up, creating a large, discolored crater at the start of the cut. This is one of the most overlooked yet critical aspects of laser cutting quality. Have you ever received a batch of laser‑cut parts where the start holes were oversized, discolored, or surrounded by splatter? These issues trace back to one thing: suboptimal piercing parameters.
Piercing is the moment when the laser first penetrates the material to begin a cut. This split‑second operation determines the quality of the entire cut. If the pierce is too aggressive, the material can splatter, leaving molten metal deposits on the surface. If it’s too slow, the heat builds up, creating a large, discolored crater at the start of the cut. This is one of the most overlooked yet critical aspects of laser cutting quality.
At Lingyufab, we understand that precision laser cutting starts with getting the pierce right. With over 20 years of precision manufacturing experience since 2003 and certification as a core supplier for Mitsubishi Electric, our advanced fiber laser cutting systems are programmed with optimized piercing parameters for every material and thickness. This guide explains what piercing is, why it matters, the different piercing methods available, and how to optimize piercing for cleaner cuts and longer consumable life.
What Is Piercing and Why Does It Matter?
Piercing is the process of creating a starting hole in the material before the laser begins its cutting path. A proper pierce creates a clean, consistent start point that allows the laser to transition smoothly into the cut. A poor pierce can cause defects that affect the entire part: molten metal splatter that sticks to the surface and requires post‑processing, excessive heat input that discolors and work‑hardens the surrounding material, an oversized or irregular start hole that compromises part geometry, and accelerated nozzle and lens wear from back‑splatter.
Factors Affecting Piercing Quality
Several variables influence piercing quality, and they all interact with each other. Getting piercing right requires understanding how these factors work together.
Piercing Time — The duration of the pierce must be carefully controlled. Too short, and the beam doesn’t fully penetrate, resulting in an incomplete or rough hole. Too long, and the heat spreads beyond the pierce zone, causing discoloration and a larger heat‑affected zone. The ideal piercing time varies with material thickness and type—thicker materials require longer pierce times to achieve full penetration. Modern laser systems allow precise programming of pierce duration to match specific material conditions.
Peak Power — The laser must deliver sufficient peak power during piercing to overcome the material’s initial reflectivity and melt through the surface. However, excessive power can cause violent splatter and material ejection. A balanced approach—adequate power for penetration without excessive energy—is essential for clean piercing. Fiber lasers are particularly effective for piercing because their shorter wavelength is absorbed more efficiently by metals, reducing the power required for initial penetration.
Piercing Methods and Their Applications
Different piercing methods are suited to different materials and thicknesses. Choosing the right method can significantly improve cut quality and reduce consumable wear.
Pulse Piercing (Percussion Drilling)
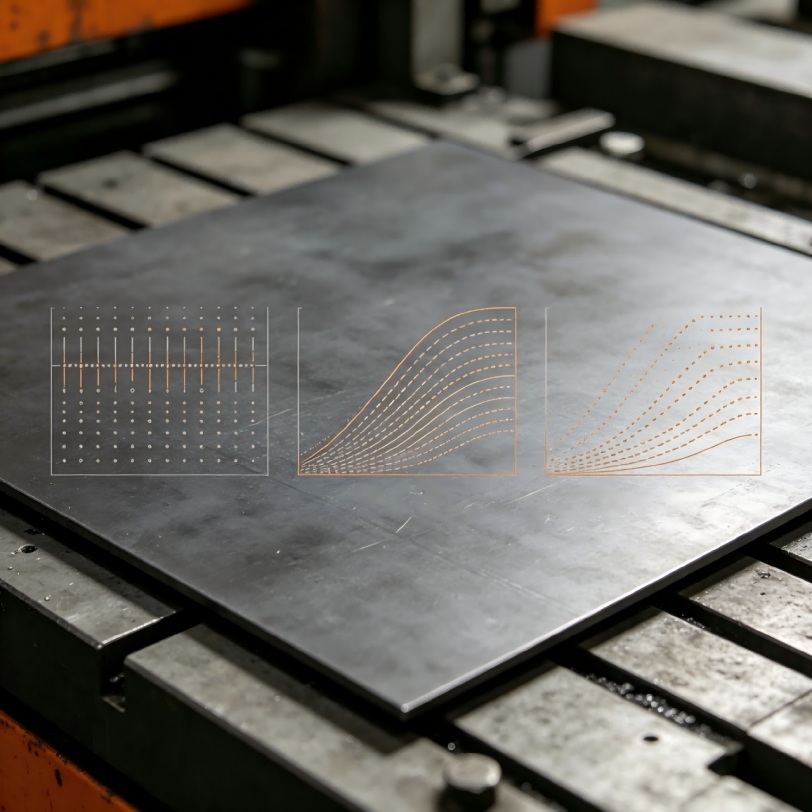
Pulse piercing uses a series of short, high‑energy pulses to drill through the material. The pulsing action prevents heat from building up in a single spot, reducing the risk of splatter and minimizing the heat‑affected zone. This method is particularly effective for stainless steel and aluminum, where heat control is critical to maintaining material properties. Pulse piercing is the preferred method for materials under 5mm thickness, where the risk of heat distortion is highest.
Ramp Piercing
Ramp piercing gradually increases the laser power as the beam penetrates the material. This controlled ramp‑up allows the beam to “find” the right energy level for the specific material thickness, reducing the risk of violent splatter on breakthrough. Ramp piercing is often used for thicker materials (over 6mm) where a sudden burst of power would cause excessive material ejection. The gradual increase in power also helps to minimize the crater size at the pierce point.
Multi‑Stage Piercing
For very thick materials or high‑value parts, multi‑stage piercing combines pulse and ramp techniques. The beam begins with a series of pulses to create an initial crater, then ramps up to full power to complete the penetration. This approach minimizes the heat input at each stage while ensuring reliable penetration. Multi‑stage piercing is commonly used for materials over 10mm thick or for applications where the pierce point will be visible in the final part.
How to Optimize Piercing Parameters
A systematic approach to piercing parameter optimization can dramatically improve cut quality and reduce costs:
Start with established baselines — Begin with the manufacturer’s recommended parameters for your material and thickness.
Perform a short test pierce — Observe the piercing process for splatter, sparks, and the size of the crater. A clean pierce should produce minimal splatter and a small, uniform hole.
Adjust one parameter at a time — Make small adjustments to pierce time, power, or method, and observe the results. Changing multiple parameters simultaneously makes it difficult to identify the root cause of improvements or problems.
Evaluate the pierce quality — Check the size and shape of the hole, the extent of discoloration, and the amount of splatter on the surrounding surface.
Document successful settings — Store optimized piercing parameters for each material and thickness to ensure consistency across future production runs.
Common Piercing Problems and How to Fix Them
Splatter on the surface — Usually caused by excessive piercing power or too rapid a pulse sequence. Reduce peak power or switch to ramp piercing. Ensure proper assist gas pressure to blow molten metal away from the pierce zone.
Oversized or irregular pierce hole — Often caused by excessive pierce time or incorrect focus position. Reduce pierce time or check focus position. A focus that is too high (positive focus) can cause the beam to spread, creating a larger hole.
Discoloration or burn marks — Caused by excessive heat input. Reduce pierce time, switch to pulse piercing, or increase assist gas pressure to cool the pierce zone.
Incomplete penetration — The beam doesn’t fully penetrate the material. Increase pierce time or power. Check for focus drift or contamination on the lens.
How Lingyufab Optimizes Laser Cutting Piercing
Lingyufab is a professional sheet metal fabrication manufacturer and sheet metal supplier based in Shanghai, China, with over 20 years of precision manufacturing experience since 2003. We follow strict Japanese quality standards and are a certified core supplier for Mitsubishi Electric.
What sets Lingyufab apart as a sheet metal supplier is our systematic approach to laser cutting optimization—including piercing parameters. Our engineering team reviews your drawings before production, identifying potential piercing issues and optimizing parameters for your specific material and thickness. Our advanced fiber laser cutting systems feature automated piercing control, allowing us to program pulse, ramp, or multi‑stage piercing methods for optimal results on every part.
Our in‑house capabilities include:
Laser cutting — High‑precision fiber laser cutting with optimized piercing parameters for clean starts and minimal defects.
CNC bending — Precision bending with consistent accuracy and springback compensation.
Laser welding — High‑speed, low‑distortion welding with minimal heat input.
Sheet metal fabrication — Complete assembly, surface treatment, and fastener installation.
ISO 9001, ISO 14001, and TÜV CE certified.
Full material traceability with Mill Test Certificates.
One supplier, full responsibility. From laser cutting and CNC bending to welding, surface treatment, and fastener installation, we handle everything under one roof. This integration ensures consistent quality, shorter lead times, and a single point of accountability for your entire project.
If you are concerned about piercing quality in your laser‑cut parts, our engineering team is available to review your requirements and provide a free consultation. We’ll help you identify the right piercing approach for your specific material and application. If you are looking for a reliable sheet metal fabrication supplier, please don’t hesitate to contact us.
Quick Piercing Quality Checklist for Buyers
| What to Check | What to Look For |
|---|---|
| Pierce hole size | Hole should be uniform and not oversized for the material thickness |
| Splatter | Minimal or no molten metal deposits around the pierce point |
| Discoloration | No excessive burn marks or heat discoloration around the pierce |
| Edge quality at start | The cut edge should be smooth from the very beginning of the cut |
| Consistency | All parts in the batch should have similar pierce quality |
FAQs
Q1: What is piercing in laser cutting?
Piercing is the process of creating a starting hole in the material before the laser begins its cutting path. A proper pierce creates a clean, consistent start point that allows the laser to transition smoothly into the cut.
Q2: What is the difference between pulse piercing and ramp piercing?
Pulse piercing uses a series of short, high‑energy pulses to drill through the material, which prevents heat buildup and reduces splatter. Ramp piercing gradually increases laser power as the beam penetrates, reducing the risk of violent splatter on breakthrough.
Q3: Why do my laser‑cut parts have splatter around the start hole?
Splatter is usually caused by excessive piercing power or too rapid a pulse sequence. Reducing peak power or switching to ramp piercing can help. Proper assist gas pressure is also essential to blow molten metal away from the pierce zone.
Q4: What causes discoloration around the pierce point?
Discoloration is caused by excessive heat input. To minimize it, reduce pierce time, switch to pulse piercing, or increase assist gas pressure to cool the pierce zone.
Q5: How do I choose the right piercing method for my material?
Pulse piercing is generally preferred for materials under 5mm thickness, where heat control is critical. Ramp piercing is often used for thicker materials (over 6mm). Multi‑stage piercing is used for very thick materials (over 10mm) or high‑value parts where minimizing heat input is essential. Consulting with your fabricator’s engineering team can help you select the optimal method for your specific application.
Q6: Can Lingyufab optimize piercing for my specific material? Yes. Lingyufab’s engineering team can review your requirements and recommend the optimal piercing parameters based on your material type and thickness. Our advanced fiber laser systems feature automated piercing control for consistent results across all parts.